cooking. baking. recipes. eating out.

cooking. baking. recipes. home economics. eating out.


Thursday, October 27, 2011

Arugula, Orange and Toasted Walnut Salad

This is a flavorful salad that tastes best in the fall and winter as the ingredients are so seasonal, almost Christmasy, with the oranges and walnuts. In this recipe you will need to "supreme" the oranges. This may seem a bit elaborate in concept but once you do it a few times you'll be able to do a whole orange in a minute. You will also be able to use this skill in other dishes. I think it's a beautiful way of cutting up an orange.


1-2 oranges, number and type by preference
1/4 cup walnuts
2 oz. arugula

1 tsp. red wine vinegar
1/4 tsp kosher salt
1/4 tsp black or white pepper
1/2 Tbsp olive oil

On a cutting board and using a sharp knife, cut the top 1/2" and bottom 1/2" off an orange.


Next, using vertical cuts, cut strips off the side of the orange. Be sure to cut off all the white part (pith) but try to leave as much of the flesh as possible.


Over your salad bowl and using a very sharp paring knife, start removing the segments from the orange leaving behind the membranes. Let the excess juice fall into the salad bowl and set aside the segments in another small bowl.


Once you have removed all the segments, squeeze what remains in your hand over the salad bowl. You'll have a good tablespoon or two. The juice will be part of the dressing.

Add the vinegar and salt to the orange juice in the salad bowl. Whisk to disolve the salt. Add the pepper. Then whisk in the olive oil. Set aside.


Place a small skillet over high heat. When hot, toast the walnuts for a few minutes until fragrant and changing color. Remove from heat and set aside.


Toss the arugula, half the orange segments and half the nuts in the dressing. Plate on salad plates and garnish with the remaining nuts and orange segments. Using a spoon, drizzle a little of the remaining dressing from the bowl over the salads.

Pan-Roasted Chicken and Rosemary Mac & Cheese

There is no excuse for this dish. Any respectable cardiologist (aside from the cheese-munching, chain-smoking French cardiologist my friend dated) would recoil at this recipe. Nonetheless, it is delicious and the ultimate seasonal comfort food. I always serve this in small portions - though your guests will plead for more - and also with a sharp or citrusy winter salad, like the Arugula, Orange and Walnut Salad above. The acid in the salad (and wine) will help cut the richness and fattiness of this dish.


Olive oil, any kind
2 split chicken breasts
1/2 tsp kosher or sea salt
1/2 tsp pepper
2 Tbsp brandy

1 cup heavy cream
1 cup whole milk
1/2 tsp kosher salt
1 tsp dried or 1 Tbsp fresh rosemary
4-5 oz. goat cheese or chevre

1/2 pound dried rigatoni

Heat a frying pan large enough to hold the chicken breasts over high heat. While this heats, season both sides of the breasts with the salt and pepper.


When the pan is hot, add a swirl of olive oil.


Add the chicken breasts to the pan.


Sear the breasts until golden brown on both sides.


Reduce heat to low and cook another 5-10 minutes. Then turn off the heat and cover the pan. Let the chicken sit in the pan while you continue with the recipe. It will keep cooking and will become quite tender.

Fill a large pot with cold water and place over high heat. Season the water to taste like the ocean. This will take a good tablespoon of kosher or sea salt, or less iodized table salt (a product you shouldn't own, anyway).


Put a teaspoon of rosemary in the mortar and give a few grinds with the pestle. You do not want to create a powder; you just want to break up any particularly hard or brittle pieces. If you are using fresh rosemary, chop it to the desired texture.


In a medium saucepan, heat the cream, milk, salt and rosemary over medium heat. Once the cream mixture reaches the boiling point, reduce the heat to very low and allow this mixture to cook for a few minutes. You want a little of the moisture to come off this, but don't let it boil. Once it thickens just a little, add the goat cheese in chunks.


Stir or whisk this into the sauce until melted and smooth. After a few more minutes of cooking, the sauce should coat the back of a spoon. When it does, turn it off and let sit.

Add the pasta to the seasoned water that is now at a roaring boil. Cook until al dente, usually 10-12 minutes. Drain, reserving 1/4 cup of the water in which the pasta was cooked. Return the pasta to the pot in which it was cooked.

Meanwhile, remove the cooked chicken breast to a cutting board. In the skillet you should have about 1/4 or 1/2 cup of pan juices. Turn the heat back up to high and reduce this down to a syrupy tablespoon. Deglaze the pan, scraping up any remaining bits, with the brandy. Reduce this for about 15-30 seconds and pour this dark, delicious and aromatic glaze into the cream mixture and whisk.


Reheat the sauce on a low simmer. On a cutting board, slice the chicken breast into 1/4" slices.


Add the sliced chicken to the cream sauce and turn off the heat.

Dump the cheese sauce over the cooked and drained noodles. Gently turn over to coat the noodles well. The sauce will continue to thicken as this cools, especially once it is plated. So, don't worry that the sauce is too thin. If the sauce is too thick, use some of the reserved pasta water to thin it.

Plate in wide rim or cream soup bowls. Top with a little grated Parmesan, if you wish. Serve with dry wine, a salad and Lipitor.

Serves 4-6.

Saturday, October 1, 2011

Bruschetta Three Ways

Here is another easy, quick recipe that I hope you will try. These are three finger foods great to make for entertaining that all go well together. The peppers recipe is a modified version of a similar one from Ina Garten. The olive tapenade is a recipe I made up, a copy of what I remember Jac's in Cleveland doing. The tomato bruschetta recipe is the classic American version of this treat. All three are great for serving guests with cocktails before going out, or staying in, for dinner.

Should you be tiring of my simple recipes, worry not. Christmas is only about 10 weeks away and I will merrily be posting many great holiday treats and crafts. Like gingerbread houses. Those are neither quick nor terribly easy.

All three of these, along with the toasts, can be prepped, cooked and assembled in under an hour. They should serve 6-8 people with cocktails.

The Bread

1 baguette
Olive oil, filtered or unfiltered
Kosher salt
Freshly ground pepper

Preheat the oven to 450F.

First, take a baguette and slice it into thin rounds 1/4-1/2 inch thick. You will get 30-40 slices from an ordinary baguette. Place in a single layer on a dry cookie sheet.


Brush the bread slices lightly with olive oil. Season lightly with some kosher salt and a few grinds of the peppermill.


Bake in the hot oven until golden brown and toasted dry, about 8-15 minutes depending how moist the bread was. The mositure should be baked out of the toasts or else they will be tough when cool.


Once out of the oven, allow the bread to cool on the cookie sheet then set aside to dress with the following toppings.

Olive Tapendade

15 pitted Kalamata olives
1 medium clove garlic
4 sun dried tomatoes
1 Tbsp unfiltered olive oil
1/4 tsp freshly ground black pepper

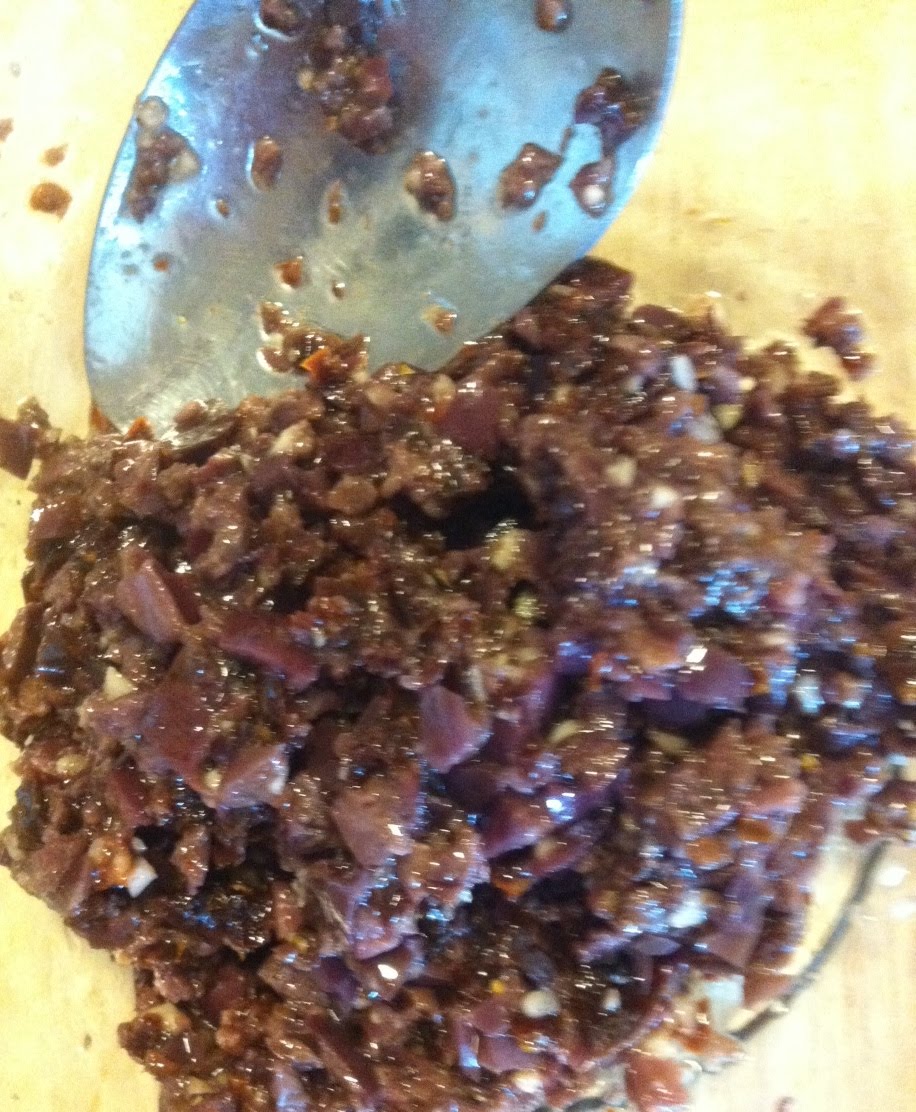
Chop the olives until they are between a mince and a dice.


Set aside in a small mixing bowl.


Mince the garlic and add to the chopped olives.


Chop the sun dried tomatoes to the same texture as the olives and add to the bowl.


Add the pepper and olive oil and stir to combine well. Cover and set in the refrigerator to keep cool.


Tomato Bruschetta

3-4 Roma tomatoes
1 medium clove garlic
1/4 cup loosely packed parsley leaves
1 Tbsp extra virgin olive oil
2 oz. Romano, shredded
1/4 tsp kosher salt
Few grinds freshly ground pepper

Core and dice the tomatoes and set aside in a mixing bowl.


Mince the garlic and add to the tomatoes.


Chop the parsley leaves and add to the mixing bowl.


Add the olive oil, salt and pepper and combine well. Cover and set in the refrigerator to keep cool.


Roasted Peppers and Chevre Bruschetta

1 Tbsp olive oil, filtered or unfiltered
1 red bell pepper
1 yellow bell pepper
Kosher salt
1/2 tsp sugar
1 Tbsp capers, drained
8 basil leaves, chiffonade
2 oz. chevre (goat cheese)

Core and seed the peppers.


Slice into thin strips.


Heat the olive oil in a skillet large enough to hold all the peppers without cramping. Once the oil is hot, almost to the somoking point, add the peppers all at once. Sprinkle with a pinch of salt and a few grinds of pepper. Saute for about 10 minutes then add the sugar. Cook another 5 minutes until the peppers have carmelized and look deeply roasted. Remember, the peppers need to be cooked enough that they are maleable and fit on a toasted slice of baguette. Large, hard pieces of pepper will make assembling the bruschetta more difficult. Add the capers and saute a few minutes more. Add the basil and remove from the heat and set aside until you are ready to assemble the bruschetta.


To assemble:

Scatter the cooled toasts on the tray on which you will serve these. Top each toast with a heaping teaspoon of olive tapenade, chopped tomato mixture, or the pepper mixture. All three mixes should make about 40 toasts. Sprinkle some freshly grated Romano on the tomato toasts and use a fork to break a little piece of chevre onto the roasted pepper topped toasts. Serve.

Thursday, September 29, 2011

Perfect Spaghetti & Meatballs

What is more basic and warm for an autumnal weekday dinner than spaghetti and meatballs? This simple, no-frills version has all the flavors one expects from this dish without adding any "signature touches" or incorporating any vapid culinary trends. In fact, this recipe was formulated by reading countless spaghetti and meatball recipes and reducing them to what was really important for the dish. Try this the next time you're not sure what to make but want to keep it easy. Or the next time you want to be a Nigella Lawson cookbook photo come-to-life: happy in the kitchen, drinking a glass of Chianti, gingerly crafting a dish you know will turn out perfectly. You won't be disappointed. Neither will the rugrats. Just keep them out of the Chianti, depending on your parenting style.

Meatballs:
1 1/2 pounds ground beef (or 1/2 pound each ground veal, pork and beef)
2 tsp Worcestershire sauce
1 egg, beaten
1/2 cup fresh bread crumbs
1/4 tsp dried oregano
1/3 cup freshly grated Parmigiano-Reggiano
1 large (2 small) clove garlic, minced
1/2 tsp kosher or sea salt
1/2 tsp freshly ground black pepper

Sauce:
1-2 Tbsp olive oil, filtered or unfiltered
1 onion, chopped
1/2 tsp red pepper flakes
2 large (3-4 small) cloves garlic, minced
1/2 cup beef stock (low sodium if not homemade)
28 oz. can of whole peeled tomatoes, preferably San Marzano
1/4 cup or a small handful loosley packed parsley leaves, chopped
8 large basil leaves, chiffonade

Pasta:
3/4 pound dried spaghetti
kosher salt

For Serving:
Grated Parmigiano-Reggiano
Crusty baguette

Preheat oven to 425F.

Place the meat in a large glass mixing bowl. Add the Worcestershire, egg, bread crumbs, oregano, cheese, garlic, salt and pepper.


Thoroughly mix by hand or with a fork.


Roll into 1-2 inch meatballs and place on a foiled, oiled or non-stick cookie sheet. You will end up with about 16 meatballs. Bake 12 minutes. Bigger meatballs will require longer.

While those bake, heat a pot over high heat in which to make the sauce. Add the oil and swirl it around the hot pot. Add the onion and red pepper flakes and reduce the heat to medium. Saute about 5 minutes until the onion is soft. Add the garlic and cook for 1 minute more until fragrant. Always take care to not burn garlic.


Stir in the beef stock and the tomatoes, hand crushing the tomatoes as you add them. (It is possible to use a can of already crushed tomatoes, preferably San Marzanos, if you want a smoother sauce.) Bring to a simmer and cook for 15 minutes, stirring every couple of minutes.


Add the parsley and basil and cook 5 minutes more. Add the meatballs to the sauce and simmer another 5 minutes.


Meanwhile, place a large pot of water over medium-high heat to boil for the spaghetti. Generously salt the water. A pinch, or even a teaspoon, won't work here. You will need to add a full tablespoon or more of kosher salt depending on the amount of water. Taste the water; it should taste like the ocean. Once at a roaring boil, add the pasta and cook to al dente. Drain. Never, ever rinse pasta! Rinsing pasta strips away the starch so that the sauce cannot stick to the noodles.

Toss the hot drained pasta with a couple ladles of the sauce. Transfer the pasta to a pasta platter. Top with the meatballs and remaining sauce. Sprinkle with some cheese and pass the rest at the table. Serve with a crusty baguette, green salad and plenty of dry red wine.


You should be able to prep and cook this meal in an hour.

Serves 4-6. Or 3 big Italian-American men.

Wednesday, September 7, 2011

Tartine's Fruit Tart

Tartine is, without a doubt, one of the finest bakeries in America and an essential stop on every trip to the Bay area. During my last visit to San Francisco - just a few weeks ago - nearly every morning began at Tartine. And why not? It's such a wonderful place, situated in the Mission near the Castro, full of sweet and bready smells, fashionable people and a line that, unless you get there early, can extend beyond the doors of this tiny place. But a line should be no deterrent.

Last Christmas, a friend gave me the Tartine cookbook, which I heartily recommend. It is lavishly photographed, beautifully laid out, and chock full of detail and kitchen tips. The book somehow gives one the precise feel for the actual place. The recipe below, with some modifications, comes from the cookbook. This is a simple, low stress dessert, perfect for entertaining and making in advance. The results are ravishing! Makes six 4" tarts.

Sweet Tart Dough
1/2 cup, plus 1 Tbsp. unsalted butter, at room temperature
1/2 cup sugar
1/4 tsp salt
1 large eggs
1 3/4 cups sifted all purpose flour

1 egg
1/4 tsp. salt

Using a stand mixer fitted with the paddle attachment, combine the butter, sugar and salt and mix on medium speed until smooth. Mix in the egg until smooth. Scrape down the sides of the bowl, add the flour all at once and mix on low speed just until incorporated.

Turn dough out onto a lightly floured surface and divide into six roughly even-sized pieces. Shape each piece into a disc about 1/2 inch thick. Wrap each in plastic wrap or a baggie and chill for 1 hour to overnight.

To line the tart pans, place a dough disc on a lightly floured surface and roll out 1/8 inch thick, rolling from the center to the edges in all directions. Lift and rotate the dough a quarter turn after every few passes with the rolling pin. Carefully transfer each circle of dough to a tart pan, easing it into the pan and pressing it gently into place. Never stretch tart dough or the sides will shrink. If the dough becomes too soft, it can be put back into the refrigerator to cool. If the dough tears, just patch with a little extra dough pressing firmly to make it adhere. With a sharp knife, trim the dough level with the top of the tart pan. Place the tarts in the freezer for 15 minutes.

Meanwhile, preheat the oven to 325F. Once chilled, remove the tart shells from the freezer and dock (make small holes) in the bottom of the tart shells with a fork or the tip of a sharp knife. Place in the oven and bake 5-7 minutes. When the tart shells go in, make the egg wash. Whisk the remaining egg and salt in a small bowl. A minute or so before the tart shells are the desired color, remove them from the oven, brush the entire interior of the shells with the egg wash and return to the oven until you achieve the desired color and the glaze is set. A well set glaze provides a barrier between the shell and the filling which prevents the shell from becoming soggy.

Let cool completely on wire racks. Then proceed with the recipe.

Makes six 4" tart shells.

Pastry Cream
2 cups whole milk
1 tsp. good quality vanilla
1/4 tsp. salt
3 Tbsp. cornstarch
1/2 cup, plus 1 Tbsp. sugar
2 large eggs
4 Tbsp. unsalted butter

Have a non-aluminum (glass or ceramic) mixing bowl ready for cooling the pastry cream with a fine mesh sieve resting in the rim.

Pour the milk into a heavy non-aluminum saucepan. Add the vanilla and salt, place over medium heat and bring just to under a boil, stirring frequently to make sure the milk solids do not stick to the bottom of the pan.

Meanwhile, in a mixing bowl, whisk together the cornstarch and sugar. Add the eggs and whisk until smooth. When the milk is ready, ladle about one third of the hot milk into the egg mixture, whisking continuously. Pour the egg-milk-sugar mixture back into the hot milk and continue whisking over medium heat until the custard is as thick as lightly whipped cream, about 2 minutes. For the cornstarch to work, the mixture must come just to the boiling point. You can see a few slow bubbles. If the cream boils, though, it will curdle. Immediately whisk the cream through the sieve into the waiting bowl. Let cool 10 minutes, stirring occasionally to release heat and prevent a skin from forming.

Cut the butter into 1 tablespoon knobs. When the pastry cream is about 140F whisk the butter into the cream, one tablespoon at a time, whisking until smooth before adding the next tablespoon.

To cool the cream, cover with plastic wrap, pressing the plastic directly onto the surface of the cream and place in the refrigerator. This prevents a skin from forming. Once the pastry cream has cooled it may be used. However, be careful not to overmix it once it has cooled. Overmixing will break down the starch and cause it to go runny. Pastry cream keeps in the refrigerator for up to five days.

Assemble the Tarts
2 half pints of raspberries
4-5 medium peaches
3 Tbsp. apricot preserves

Peel the peaches by dropping them, one at a time, into boiling water for about 10 seconds. The skin should then be easily removable. Cut the peeled peaches in half, removing the pit, then into quarters, sixths, or eighths, depending on their size. Set in a mixing bowl.

Have the tarts shells ready to fill. Spoon the pastry cream into each shell and smooth the surface with a small spatula. The tarts should be about 3/4 full. You may not use the entire pastry cream recipe. You don't want to fill the shell to the top or the fruit on top will cause the pastry cream to overflow the rim.

Gently scatter or arrange the peaches and raspberries on the filled tarts.

In a small saucepan heat the apricot jam or jelly over low heat until it is a liquid glaze. Strain through a sieve, if using jam, to remove the seeds and/or pulp. Brush the fruit with the glaze.

The tarts may be eaten straight away or stored for up to 2 days in the refrigerator. Serve them cool.

Herb Garden Salad

One of my culinary heroes, chef Joel Robuchon, was propelled to fame by the tiny portions of an herb salad he serves all his guests at his restaurants in France. The salad is special because it uses herbs, not in the dressing or as a garnish, but as the foundation of the salad. Below is a salad inspired by Mr. Robuchon that is intense, flavorful and decadent. Every bite is a delight worth savoring. I had previously been hesitant to make this salad because, if you are buying all the herbs at the market, it can be expensive. Luckily enough, my doctor knows I enjoy cooking and brought me most of the herbs, fresh from her garden, that I needed.

Herbs

1 oz. arugula
1/2 oz. frisee or curly endive, torn into natural pieces
1/2 oz. romaine, torn into small pieces
1/2 oz. spring mix or mesclun
1/2 head butter lettuce
1/2 cup basil leaves, torn into small pieces if large
1/2 cup parsley leaves
1/2 cup cilantro leaves
3 sage leaves, chiffonade
1 small bunch chives, matchsticked
1 tsp. oregano leaves
1 tsp. thyme leaves
16 mint leaves

Dressing

1 Tbsp. sherry vinegar
1 Tbsp. red wine vinegar
1/2 tsp. kosher or sea salt
1/3 cup filtered, extra virgin olive oil
1 tsp. minced black truffle, optional

Combine all the herbs but the mint in a large wooden salad bowl. Keep cool while you make the dressing.


To make the dressing, disolve the salt in the vinegar in a small mixing bowl. Whisk in the olive oil in a slow, steady stream. Add the truffle, if using. Add the dressing just before serving. Toss and plate in small portions on lunch, dinner or salad plates or ramekins. Garnish each serving with two mint leaves and a drop or two of sherry vinegar. Serve immediately.

Serves 8.

Tuesday, July 5, 2011

Martha's Fireworks Cookies

The Fourth of July is a holiday about which I am not naturally enthusiastic and eager to celebrate. For Christmas and Easter there is such great build-up in the Christian calendar with Advent and Lent that I can hardly anticipate the actual days. The Fourth, on the other hand, can be mildly melancholy, showing up out of nowhere, a hot test of patriotic optimism for me. I look at our nation and can be easily troubled. Whether it's in regard to our radical wealth disparities - we've now surpassed all South American banana republics in making our rich richer and our poor poorer - or how we deprive the sick of health care or how we still perpetuate insidious forms of racism with sentencing disparities or how we sinfully regulate access to equality based on completely irrelevant divisions like gender and sexual orientation. These are all areas where the nation from which we won independence has unquestionably done better than us. (God save the Queen!) Nonetheless, I can just as easily see America's greatness and future promise simply by reading a little of what previous great Americans have written. Who can deny America's unique place after reading George Washington's "Farewell Address" or de Tocqueville's "Democracy in America" or Martin Luther King's "Letter from Birmingham City Jail" or the Supreme Court in Olmstead v. U.S. (the right to be let alone) or anything ever written by Thoreau or Jefferson? Our current President is fond of reminding those who struggle and seek a better America of the words of Dr. King: "The arch of the moral universe is long, but it bends towards justice." For this Fourth of July, I am willing to accept that, and to move on to important stuff: baking cookies.

When I saw these beautiful cookies on the July cover of Martha Stewart magazine, I couldn't resist the challenge. It turns out, these cookies are easy to make. The ingredients are all simple and accessible and the techniques are mastered on the first whack at it. The primary investment with these cookies is time. Give yourself a good five hours, including cooling and chilling time (during which you can do other things).

The recipe below makes many cookies. For me, it made 18 four inch cookies, 24 three inch cookies and (not or) 18 one and a half inch cookies.

Martha Stewart Sugar Cookie Recipe, modified

4 cups all-purpose flour, plus more for surface
1 teaspoon baking powder
1/2 teaspoon kosher salt
2 sticks (1 cup) unsalted butter, room temperature
2 cups sugar
2 large eggs
1 tablespoon pure vanilla extract

In a large bowl, sift together the flour, baking powder and salt. Set aside.


In a mixing bowl (or the bowl of a Kitchen Aid stand mixer using the paddle attachment) whip the butter for about a minute. Add the sugar and beat for 3 minutes on medium-high until fluffy. Add the eggs, one at a time, and beat until combined. Add the vanilla and beat for a few seconds more.


Add the flour and mix on low until combined. Turn out onto plastic wrap and form into a disc or square and refrigerate for at least 2 hours.


Preheat oven to 325 degrees. Cut a maneageable piece of dough from the dough disc, about 1/4 of the total.


Roll out dough to a scant 1/4-inch thickness on a floured surface.


Cut out cookies using round cookie cutters, rerolling scraps once. When I first read the instruction to only reroll the dough once, I thought this wasteful. In practice, if you are judicious with your cookie cutting spacing, you'll only be left with a ball somewhere between the size of a cherry and a small kiwi. Transfer the cut out dough to a baking sheet and refrigerate until firm, about 30 minutes.


Bake until edges show the very first hints of turning brown, 12 to 18 minutes, depending on size. Bake the large cookies together, the medium cookies together and so on because the small cookies will cook faster than the larger ones. Transfer cookies to a wire rack, and let cool completely. Set aside until you are ready to ice them.


Martha Stewart Royal Icing Recipe, modified

5 cups confectioners sugar
5 egg whites
1 tablespoon water
juice of 1/2 lemon, strained for seeds and pulp
1/2 teaspoon vanilla

In the bowl of a stand mixer, combine on low speed the egg whites and sugar until combined. Add the water, lemon juice and vanilla and mix until combined. Turn the mixer to high and whip the icing to the desired consistency. For these cookies to turn out right (here is theonly part requiring skill and judgment), when the beater is lifted the icing should fall in a wide ribbon but absorb back into the bowl of icing after a few seconds. If the icing is too thin, it will not stay on the cookie and the colors will not remain separate. If it is too thick, it will be impossible to make the design. However, thicker royal icing can be great for cookies where you want the icing to stay put, like with a black & white cookie or a gingerbread house.


Take about 1/5 of the icing and, in a seperate bowl, dye it red. Repeat for the blue.


Decorate the cookies: Pipe an outline of white icing around the edge of 1 cookie, leaving a 1/4-inch border, then "flood" with more white icing to cover.

Immediately pipe a red or blue dot in the center of cookie. Then pipe concentric rings of colors around the center dot (using the same color as the dot, or alternating colors). If your icing is the correct consistency, it will stay put but "melt" together to form a flat surface but with a distinct separation of colors. By no means do the rings need to be perfectly done, as you can see below.


Immediately drag a toothpick through the colors to create bursts, starting from the center dot and working toward the edge, then alternate dragging inward and outward as you work around the cookie. (Or drag around the cookie in 1 direction or curve the lines for a pinwheel effect.) Let dry. Repeat with remaining cookies and icings.


Here's how they turned out:


Kitchen Tip: Good vanilla is worth it. It is especially worth it in dishes where there are not a lot of competing flavors, like in these cookies. I prefer Nielson-Massey Vanillas' products. They are a company based in Chicago and the Netherlands. Their Madagascar Bourbon Pure Vanilla Extract is fantastic. It is also Kosher, gluten-free, organic and ranked "Superior" by the American Baking Institute. You can find it at many big-city grocers, Williams and Sonoma, Sur la Table and most baking and kitchenware stores.